Your wedding day is all about celebrating you, and your wedding hair should be no exception. Whether you’re a DIY queen looking for specific styles or just looking to save some cash, doing your own wedding hair worth a try. Easy-to-use hair extensions, like clip-ins and weft extensions, can be your secret weapon for achieving the perfect wedding hairstyle. But are they the right choice for you? And how do you even get started? Don’t worry—we’ve got you covered!
From the hottest wedding hair discussions we’ve seen online to trending styles for Black brides, this guide breaks it all down. Let’s get into it!
Why It's a Good Option to DIY Wedding Hairstyles on Your Own
Let’s keep it real: hiring a stylist can be expensive, and sometimes you just want to take control of your look. Here’s why DIY might be the fit:
Cost-Effective: Doing your own hair can save you hundreds of dollars and lets you create your dream look.Plus,it gives you the freedom to experiment with different styles and accessories. It’s all about creating a look that’s uniquely you without breaking the bank.
Personal Touch: You know your hair better than anyone else.
Style Flexibility: Allow you to practice as much as you want and tweak the styles until you find your perfect fit wedding hairstyles.
Convenience: No need to stress about booking appointments or traveling to a salon.
But before you grab those bobby pins, let’s figure out if DIY is really for you.
How to Tell: Should You Do Your Own Hair or Hire a Stylist?
Not sure if you should DIY or call in a pro? Ask yourself these questions:
1.Are you confident in your skills? If you’ve nailed similar styles before, go for it!
2.Do you have time to practice? DIY requires trial and error, so start early.
3.Is your desired style super complex? Some looks (like intricate braids) might be better left to a pro.
4.Will it stress you out? If doing your own hair will add to your wedding day anxiety, hire a stylist.
Still unsure? Try a test run a few months before the big day. If it goes well, you’re golden. If not, you’ve got time to book a stylist.
How Early Should I Practice My Wedding Hairstyle?
Okay, let’s talk about this because I learned the hard way: practice is everything. When I was planning my wedding, I thought, “How hard can it be to do my own hair?” Spoiler: harder than I expected. Here’s what I wish I knew sooner, based on my experience and what I’ve seen on Reddit and youtube:
1. Start Practicing At Least 3 Months Before
I made the mistake of waiting until 6 weeks before my wedding to try out hairstyles. Big mistake. The first time I attempted a braided crown, it looked like a toddler did it. I panicked and almost booked a stylist last minute. But then I saw a Reddit thread where someone said, “Start practicing 3 months out, and you’ll thank yourself later.” So, I listened.
I dedicated one day a week to practicing different styles. By the time my wedding rolled around, I could do my braided crown in under 30 minutes. Moral of the story: give yourself time to mess up, learn, and perfect your look.
2. Do a Full Trial Run with Your Dress and Accessories
Here’s another thing I didn’t think about: your hairstyle needs to work with your dress, veil, and any other accessories. I practiced my sleek low bun a bunch of times, but when I finally tried it with my dress and veil, the bun was too low, and the veil kept slipping. Cue another save—someone suggested doing a full trial run with everything at least a month before the wedding.
So, I did. I put on my dress, clipped in my veil, and styled my hair exactly how I wanted it. It was a game-changer. I realized I needed to adjust the height of the bun and add more pins to secure the veil. Trust me, this step will save you from last-minute stress.
3. Start with Hairstyles That Boost Confidence
Here’s something I didn’t realize until I was deep into wedding planning: not every trending hairstyle is going to make you feel like you. I tried a bunch of Pinterest-worthy styles, but some of them just didn’t feel right. Then I remembered a Reddit comment that said, “Your wedding day is about feeling confident, not just looking good.”
So, I went back to basics and tried styles I already knew I loved. For me, that was voluminous curls with clip-in extensions. It was easy to do, and I felt like a million bucks. If you’re not sure where to start, pick a style you’ve worn before and loved. Build your confidence with that first, then experiment with new looks if you want to.
What Are Beginner-Friendly Wedding Hair Extension Options?
If you’re new to extensions, start with these easy-to-use options:
human hair clip Ins: Perfect for adding volume or length without commitment.
Braiding human hair : Braided hairstyles are a timeless favorite, whether it’s a chic updo, a half-up half-down look, or bohemian braids with curls. From sleek and elegant straight styles to voluminous blowouts, braiding human hair makes it easy to achieve your dream look effortlessly.
Drawstring Ponytail Extensions: Instant glam for updos or high ponytails.
Headband Wigs: Super easy to put on and take off—great for beginners.
How Many Switch Hairstyles Do You Need to Prepare for Your Wedding?
Switching up your hairstyle mid-wedding is a vibe, but how many looks do you really need? Here’s the breakdown:
Ceremony: Go for something elegant and timeless (e.g., a braided crown or sleek bun).
Reception: Switch to a more relaxed or fun style (e.g., loose curls or a high ponytail).
After-Party: Keep it simple with a quick change, like adding a hair accessory or taking down an updo.
Two to three styles are usually enough unless you’re going for a full-on transformation.
What Tips Would Be Helpful to Make Your Hairstyle Last All Day?
You want your hair to look fresh from “I do” to the last dance—no slipping, no frizz, just flawless vibes all day. Here’s how to make it happen, especially if you’re dealing with tricky hair or need extra security:
1. What If Your Hair Is Hard to Hold Curls?
If your hair struggles to hold curls (trust me, I’ve been there), here’s what works:
Prep Your Hair: Start with clean, dry hair and use a heat protectant before curling.
Choose the right styling tools and set the proper heat: Opt for a high-quality curling or straightening tool with adjustable heat settings. For stubborn hair, use a smaller barrel (1-inch or less) and heat (around 140°F–160°F) to lock in those curls.
Set the Curls: After curling, pin each curl in place and let it cool completely before releasing. This helps set the shape.
Lock It In: Finish with a strong-hold hairspray or a light mousse to keep the curls intact.
If your hair still can’t hold curls, try heatless methods like pin curls or foam rollers. Here’s how: apply setting lotion to damp hair, roll it up, and sleep on it. Small rollers = tight curls, large rollers = soft waves. Wake up with glamorous, long-lasting curls—no heat needed!
2. What Tools or Accessories Are Necessary for Security?
To keep your style locked in place, these tools and accessories are lifesavers:
Bobby Pins: Use the good ones—strong, durable, and preferably matte to blend with your hair. Crisscross them for extra hold.
Elastics: Opt for snag-free, silicone hair ties that won’t break your hair.
Hair Clips and Combs: Decorative clips or combs can add both style and security, especially for updos.
Edge Control: A strong edge control gel will keep your baby hairs and edges laid all day.
3. General Tips for Long-Lasting Styles
Use the Right Products: Edge control, strong-hold hairspray, and heat protectant are non-negotiable.
Blow Dry Your Roots: This helps prevent frizz and keeps your style intact, especially if you’re going for volume.
Prepare a Touch-Up Kit: Include extra bobby pins, a travel-sized hairspray, and a small mirror for quick fixes throughout the day.
8 Easy Trending Wedding Hairstyles for Black Brides Worth a Try
Ready to slay? Here are 8 easy, trending hairstyles you can DIY with extensions:
1. Voluminous Curls with Clip-Ins
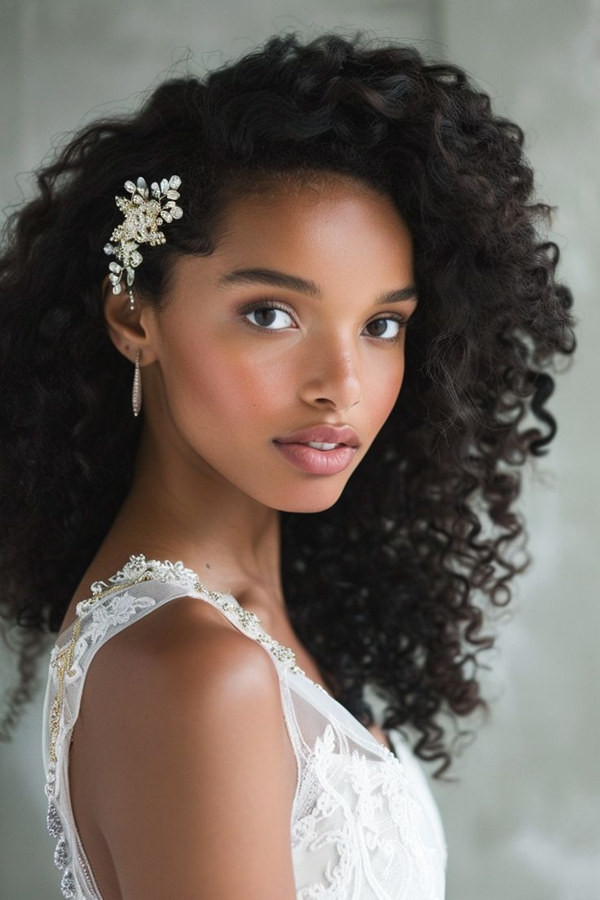
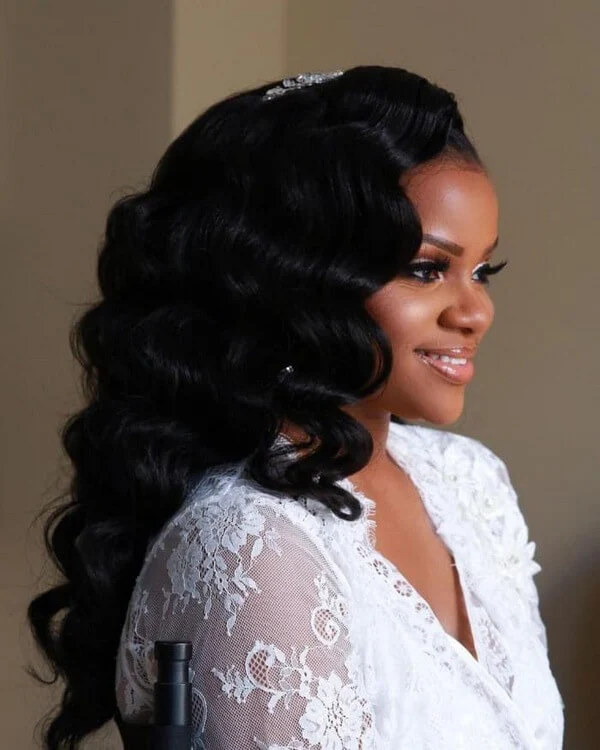
Perfect for a romantic, timeless look. Curl your natural hair and extensions together for seamless bounce.
2. Braided Crown low Bun with Extensions
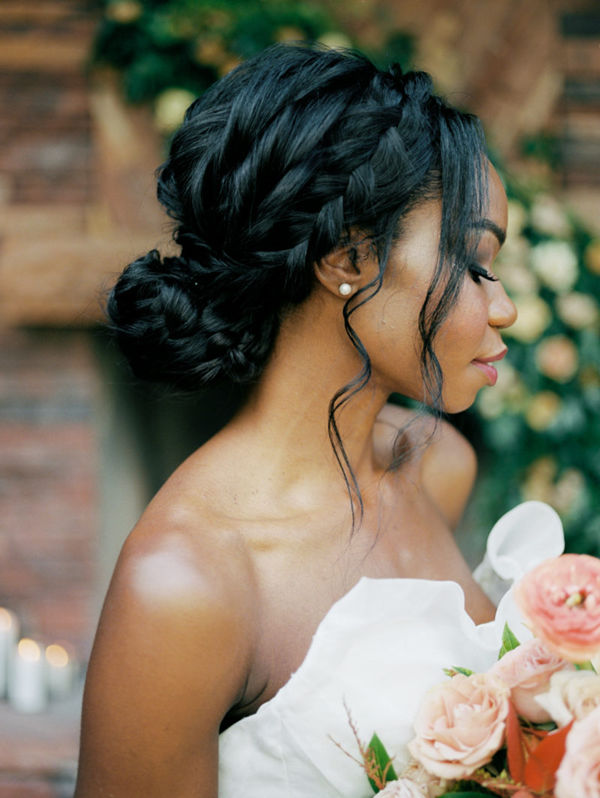
A regal style that’s perfect for outdoor or boho weddings. Add pearls or flowers for extra flair.
3. Sleek High Ponytail
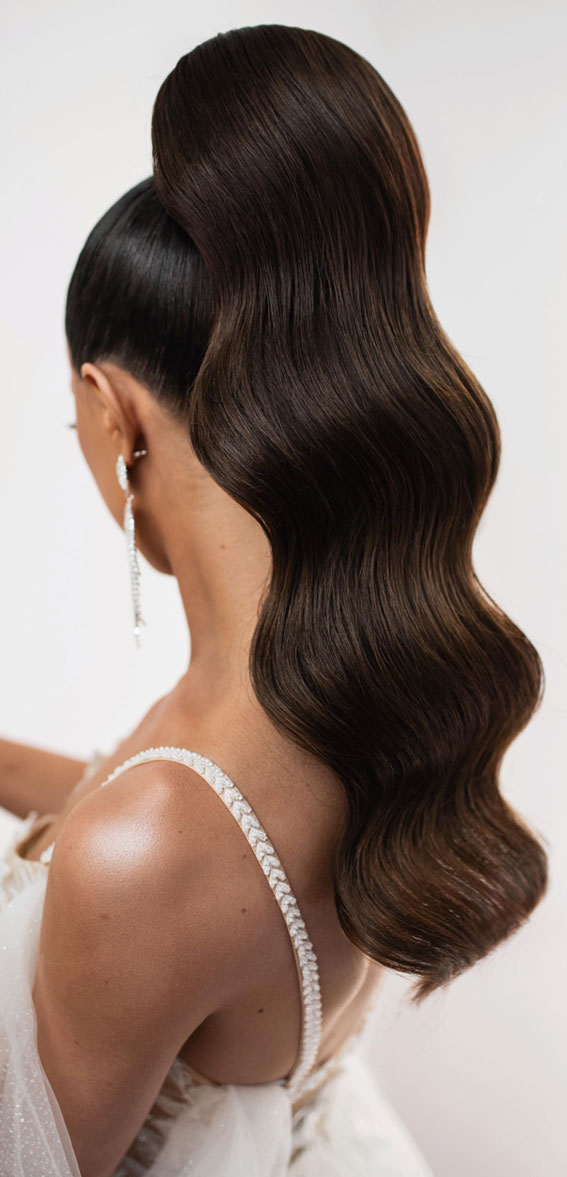
Modern and chic. Use straight clip-in extensions and edge control for a sleek, polished finish. For an extra touch, add fringe strands to match your vibe and complement your wedding dress.
4. Half-Up, Half-Down with Curls
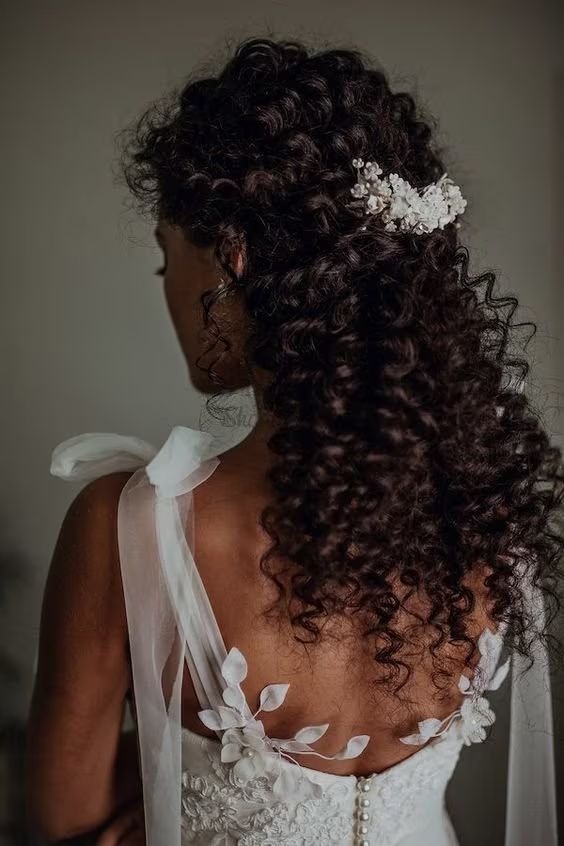
Soft and feminine. Add clip-ins for volume and curl the ends for a romantic vibe.
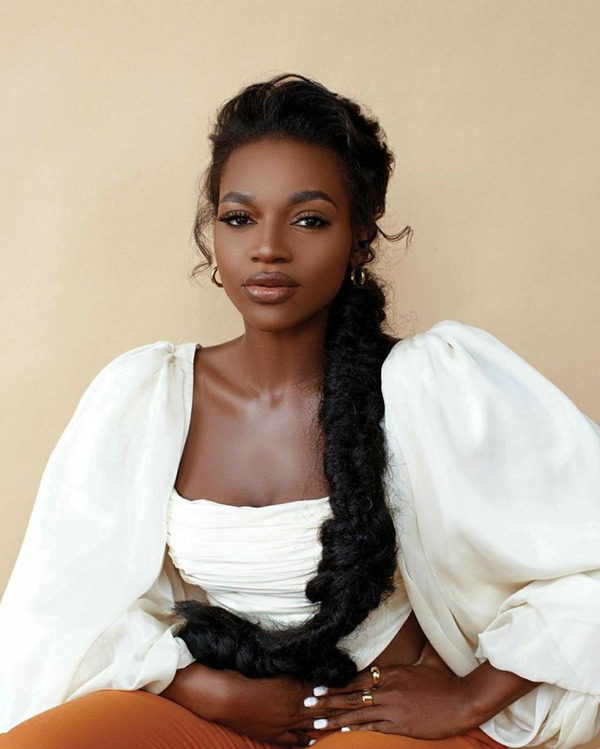
3. Long French Braid Pony
6. Low Bun with Extensions
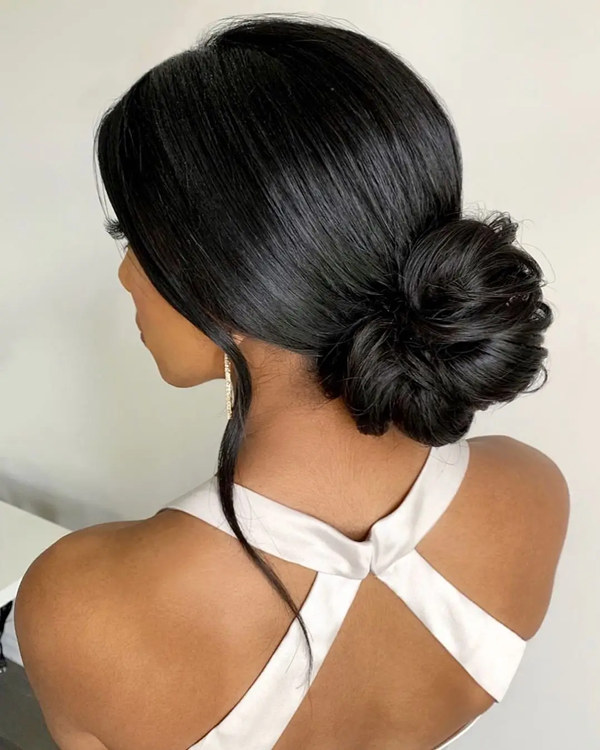
Elegant and sophisticated. Add a jeweled hairpiece for a touch of glam.
7. High bun with Face Framing Fringes
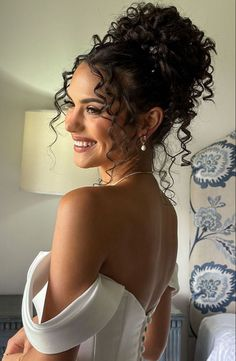
8. Flat Twist Bun
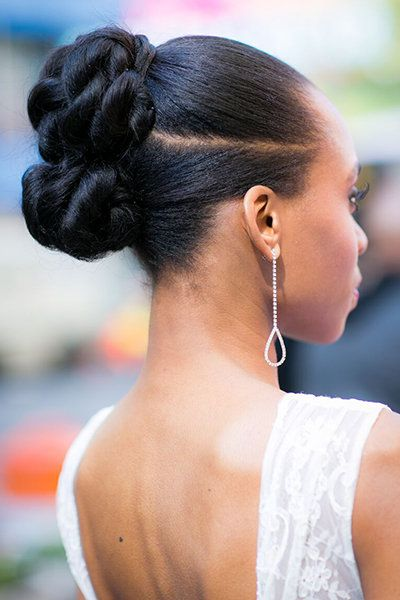
Blend your natural flat twist with coarse yaki or curly extensions for added volume and definition.
looking for a tutorial to DIY your own wedding hair,check this blog:Best Clip In Extension Hairstyles For Special Occasions: 18 Gorgeous Looks
Final Thoughts
DIY wedding hairstyles can be a fun, cost-effective way to express your personal style on your big day. Whether you’re a beginner or a pro, these tips and styles will help you create a look that’s uniquely you.
So, are you team DIY or team stylist? Let us know in the comments—and don’t forget to share your favorite wedding hair tips!


