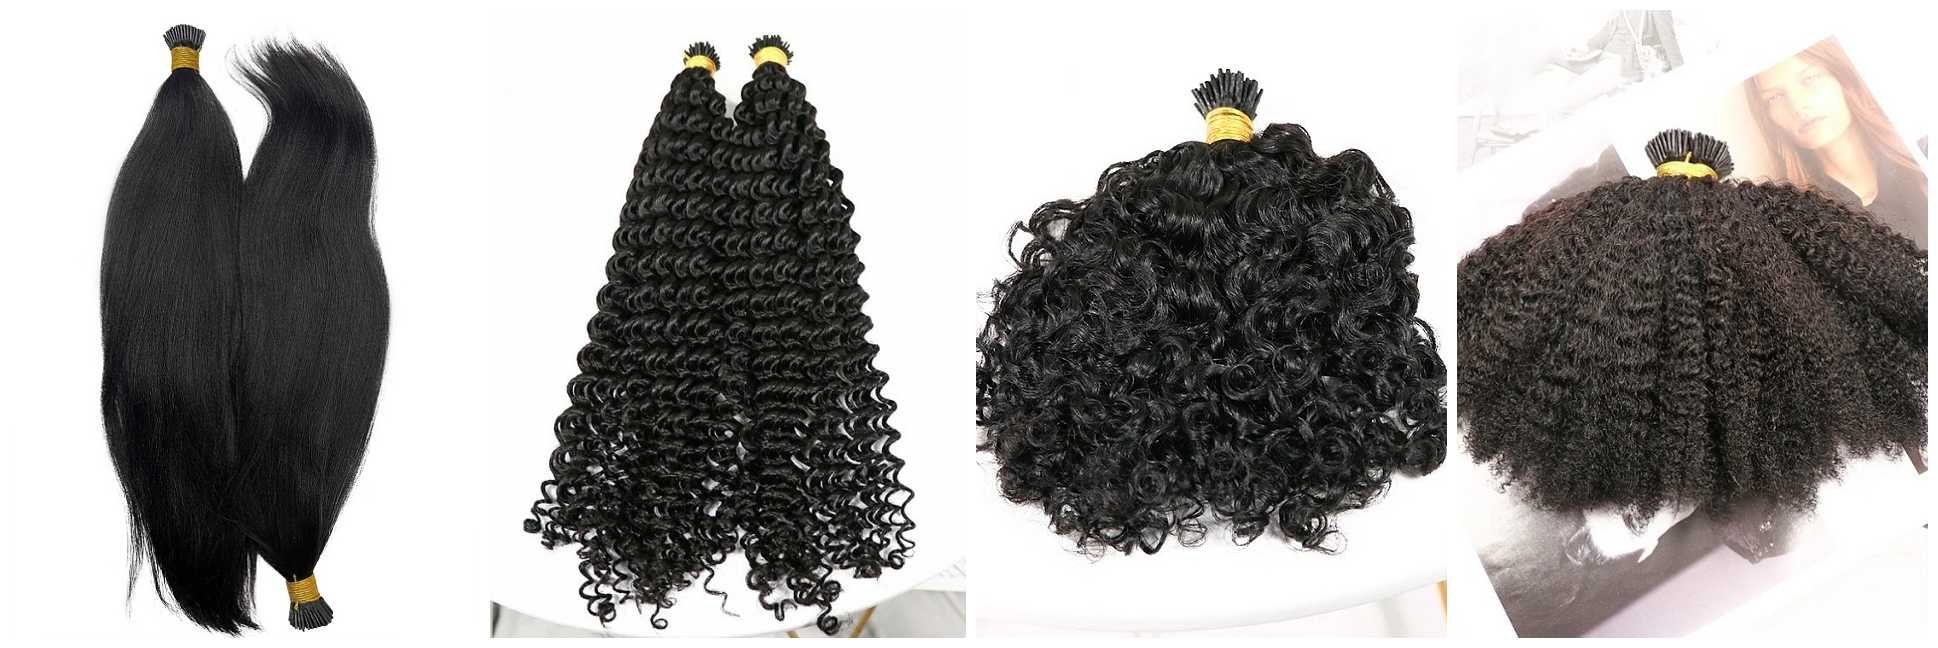
As an impeccable method of hair extensions, microlink is currently coveted by many hair extensions wearers for making a seamless natural look which is incredibly adaptable to any hair texture. Microlink hair extensions feature small beads attaching the hair extension to your natural hair. The beads are usually made by silicone or metal and clamped the extension and your hair in place.
If you are on the hunt for a fresh way to switch up your strands adding length and volume to your natural hair. Just read on and we hope this guide help you understand all about microlinks hair extensions.
What are Microlink hair extensions?
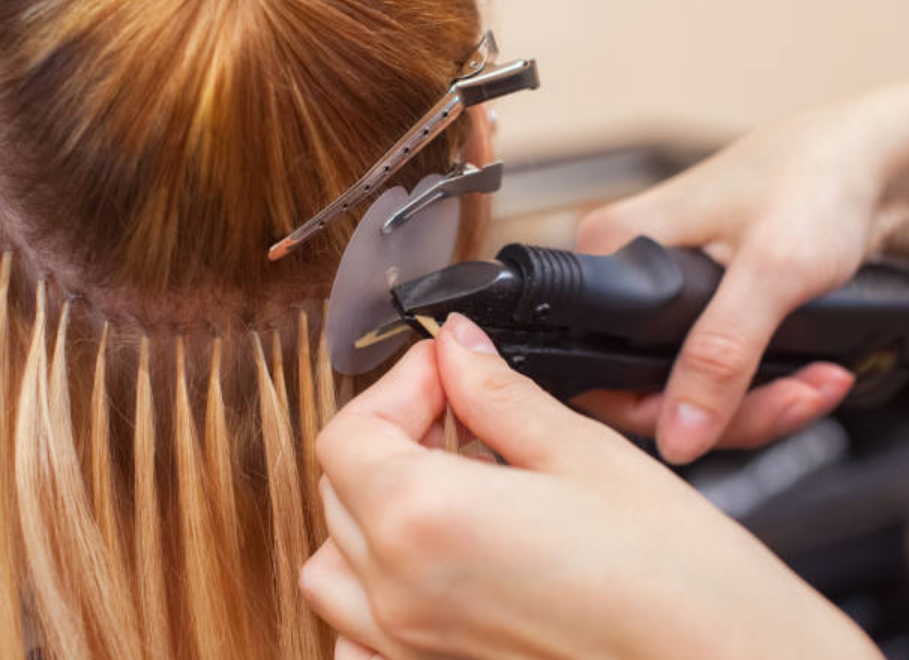
Unlike other extension techniques, there are two main types of micro-link extensions in general. According to the installment method, micro-links are usually classified as I-tips and beaded weft extensions. I-tips are attached strand by strand while wefts are installed row by row.
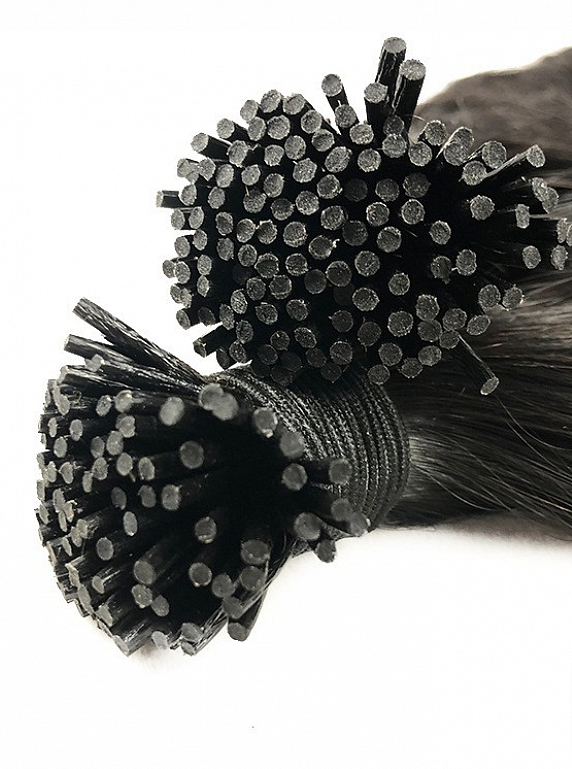
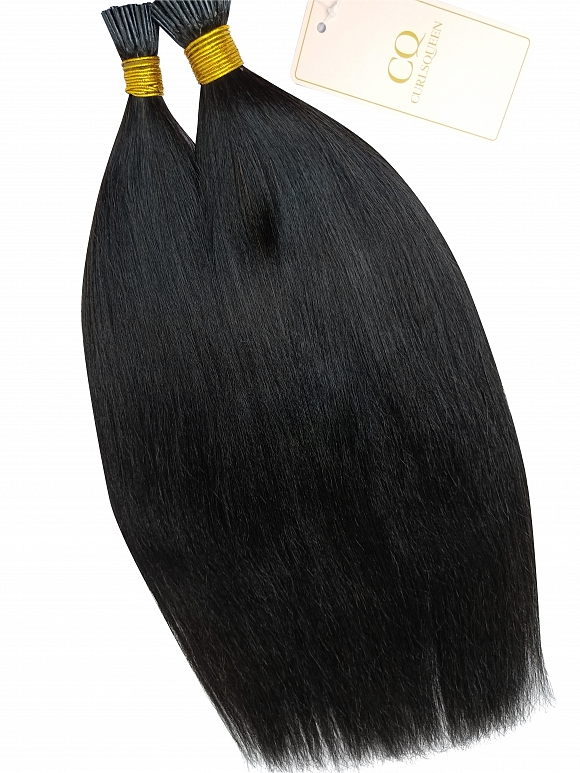
Microlink I-Tips are also know as microbead, microring, microtubes, nanorings, cold fusion, beaded extensions, and strand by strand. A piece of microlink I-Tips hair extensions consists of a pre-tipped keratin I-tip strand of hair which is installed through a small silicone or metal beads.
The cylinder micro bead made by copper or aluminum usually attaches the tiny strand of hair weighing 1g on average to your natural hair by clamping the extension and your natural hair strand together. The hair extension and your natural hair will be foist into the small bead and then be pressed flat.
The beaded weft extensions are wefts attached with a row of tiny beads at the top. The pieces of your natural hair above and below the weft will be pulled through the microbead or microtube with crochet tool and the beads will be clamped with pliers. The hair is sewn together by machine and formed a panel that can be wrapped around your head which makes for a pretty durable hair extension.
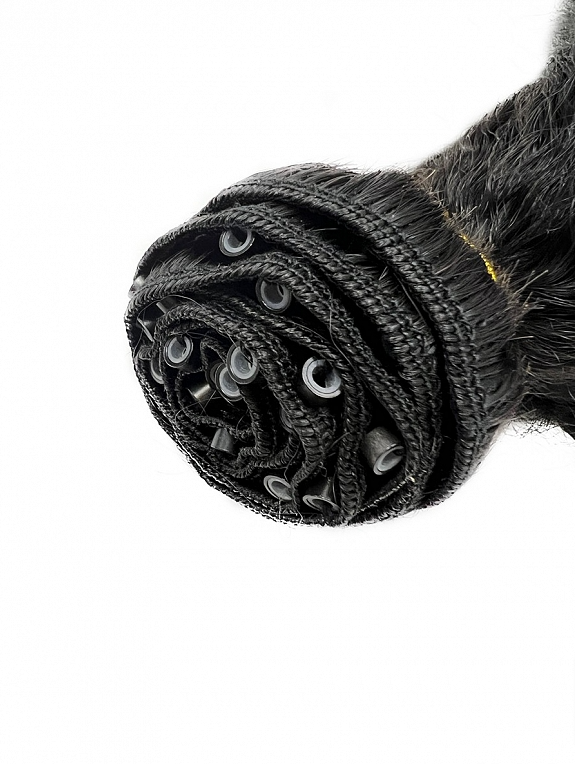
The microtubes are usually black or brown so that they blend with your own hair color seamlessly. However, the installation process take anywhere hours and that may be some of tedious. Microlinks are available for someone spending time on installing and maintenance.
Why are microlinks prevailing on Tiktok ?
Natural appearance—microlinks hair extensions are easier to hide seamlessly while blending with your natural hair.
Invisible and flexible—The small beads that link your natural hair with the extension are small and undetectable which keep the flexibility to the greatest extent.
More hairstyle options—It is because microlinks keep the flexibility of your natural that your hair could move freely. They allow for a ton of styling flexibility and free movement of the hair. And you can treat them like your own hair and get various hairstyles as you want.
Lower risk of scalp discomforts—Microlinks are the safest hair extension that most of people can get. If you head for a healthy way for hair extensions. Why not try it? They can be installed comfortably without any tension, harsh chemicals or any side effects on your scalp.
Least Damaging—Microlinks remove your worries about damage from pulling, rubbing, or snagging as long as installed properly and you may not remember that they are on your head until scratching your head. Microlinks hair extensions will be applied without any braiding, tape, glue, heat, adhesives or other chemicals.
Low Maintenance—Maintenance should be done about 6-8 weeks later after the installment to avoid breakage and maintain the service life of the extensions.
Easy removal and reusable
Braidless and breathable
Great durability
More hair texture options
......
Do microlink extensions damage my natural hair?
It’s non-damaging for your natural hair.
The microlink are placed on the strand of your natural hair and the hair extension strand is inserted into the micro beads and be clamped flat with the pliers which is a glue-free installing process. It is relatively safe method of hair extensions.
In fact, whichever hair extension process may bring damage to your hair more or less if the extensions are not installed properly or carefully maintained.
Do microlinks cause breakage?
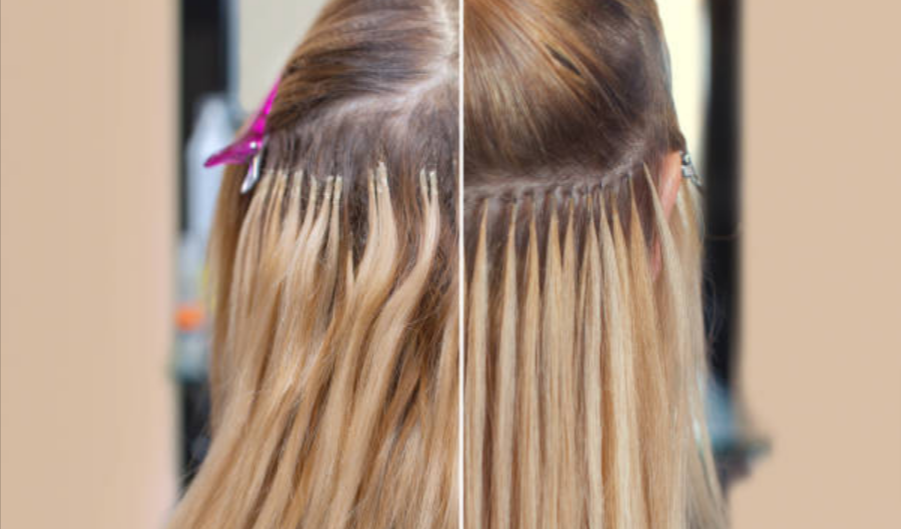
As we have already mentioned, it depends on your maintenance and how you take care of your hair. Improper installment like too close to your scalp, nonuniform distribution of hair weight and tight hairstyles will definitely cause breakage.
If you just wear your hair extensions without protection to keep your hair from getting dry and brittle or just continuously brush your hair every day, the breakage does appear. In addition, tight ponytail, hair drying or flat ironing cause breakage as well.
Keep hair products including mousse, gel, serums and hairspray away from micro beads. The chemicals inside may generate reaction with keratin bonds and make them sticky or loose as a result of slipping off your hair.
Who are not suitable for microlinks?
Short hair

Naturalists with short hair may not quite suitable for microlink hair extensions for achieving a better look. Microlinks are suitable for almost anyone regardless of your hair texture as long as the length of your natural hair reached at least four inches long because there should be some length for microlink i-tips to hold up for successful installment or they may not blend well with short hair.
If you intend to keep your hair short while adding volume with microlinks, get microlinks with appropriate inch matched your natural hair to ensure the extension blends naturally with your real hair.
Unhealthy hair
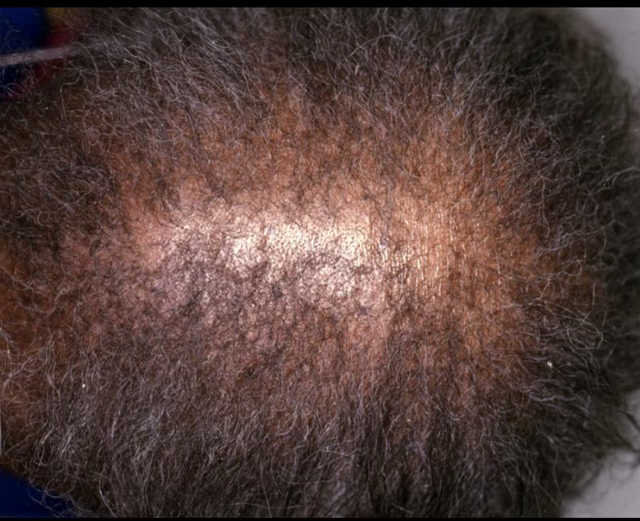
Microlinks don't work for unhealthy hair either. If you suffer from hair loss or excessive shedding, you should probably take other techniques into consideration. Once your hair microlinks extensions stretched, pulled, twisted, braided, or blown out, your alopecia or bald spots will be aggravated.
Thin and permed hair
Naturalists with thin and permed hair should also think carefully before getting microlinks extensions for the reason that the weight from micro-link extensions will add extra stress and tension to your relaxed and permed natural hair and cause breakage.
In addition, the installment and maintenance may not be within your budget if you take good care of your microlinks extensions to expand its service life.
How long does microlinks last/how long should I keep microlinks in?
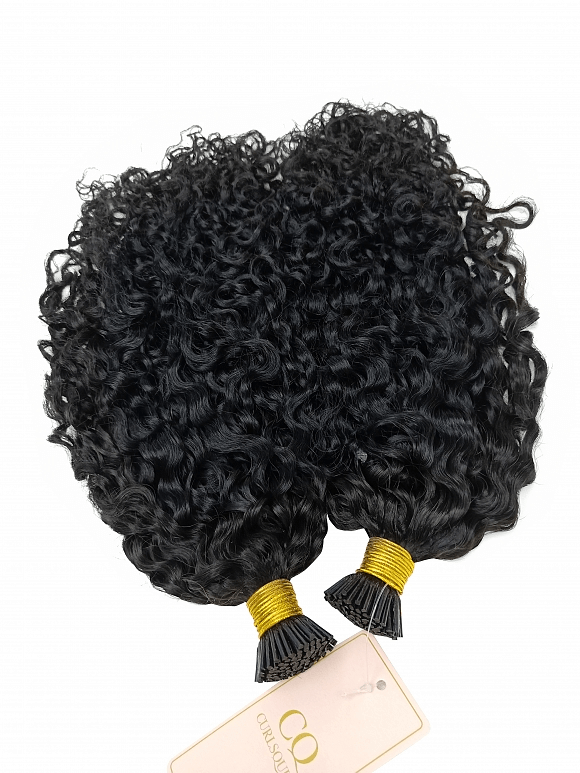
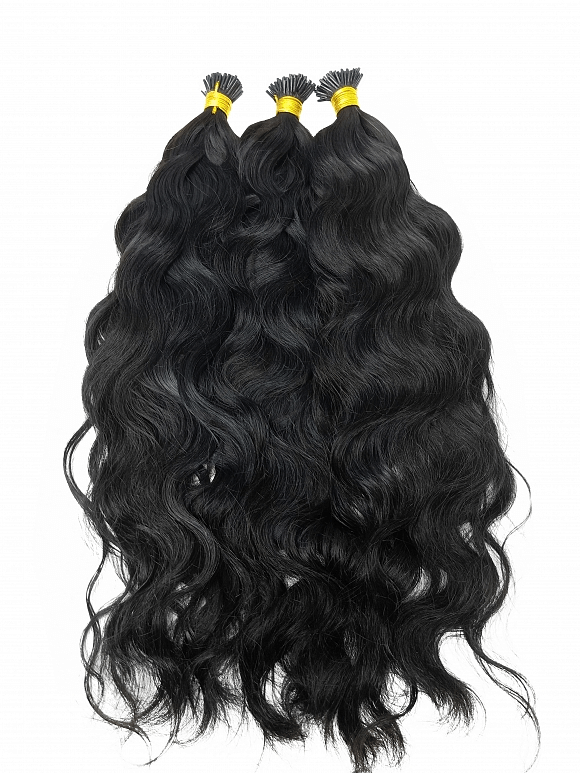
The microlinks of straight and wavy texture can be reused for UP TO A YEAR while the service life of curly and kinky texture are a little bit shorter than that.
![]()
![]()
The curls and coils have been permed in their producing process so that the life span of curly microlinks is not as long as others and fall out earlier than straight hair. And when it’s time to remove them, just take the extensions down with pliers.
However perfect installed and cared are your microlinks, the natural hair will shed and grow out as a result of metabolism. In consequence, please note the condition of your microlinks and get them reinstalled to avoid any damage and breakage every SIX TO EIGHT weeks.
The frequency of reinstallation depends on your natural hair growth and shed rate and it’s up to you whether having your weft extensions professionally removed with stylist in salon or pulling yourself up by your bootstraps.
How to install I-tip microlinks?
- Section your natural hair into horizontal parts.
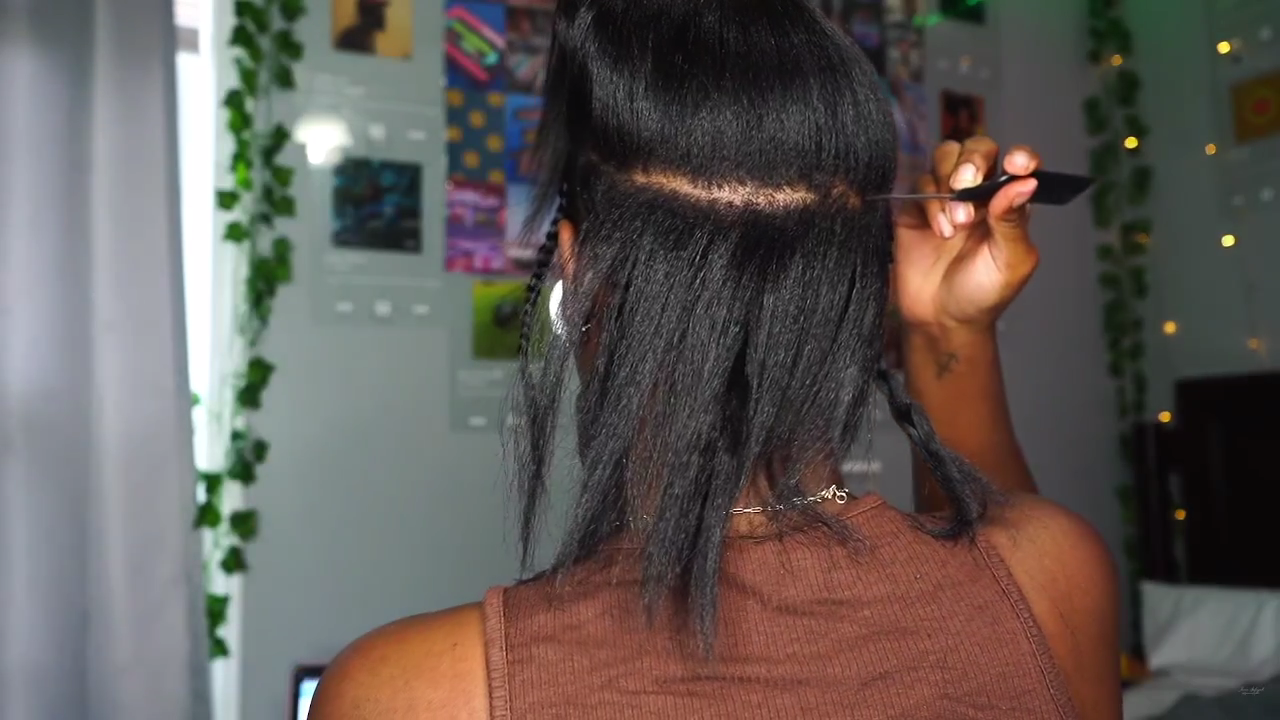
- Clip the rest parts and put them out of the way and install the I tips from the bottom.
- Section the lowest layer into equal strands.
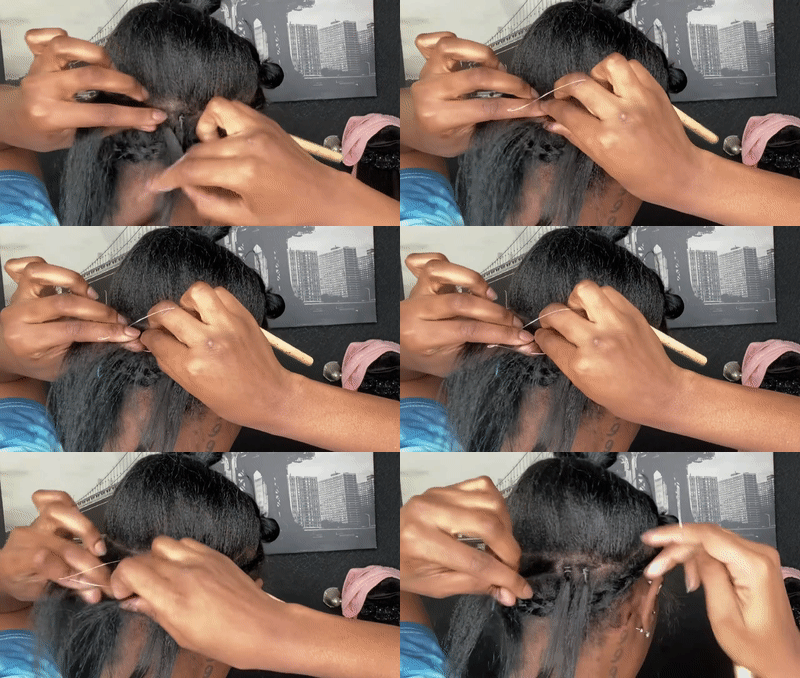
- Take a strand of your hair and slide it through the pulling hooks.
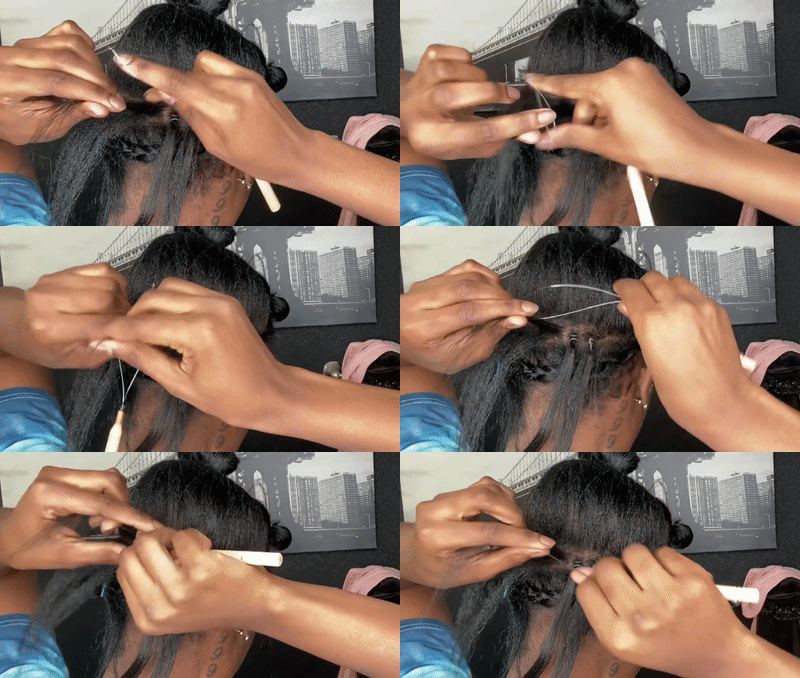
- Pull the bead up onto the hair. Don’t pull it too close to your scalp or it may be stuck at the root where you can't lift your hair up.
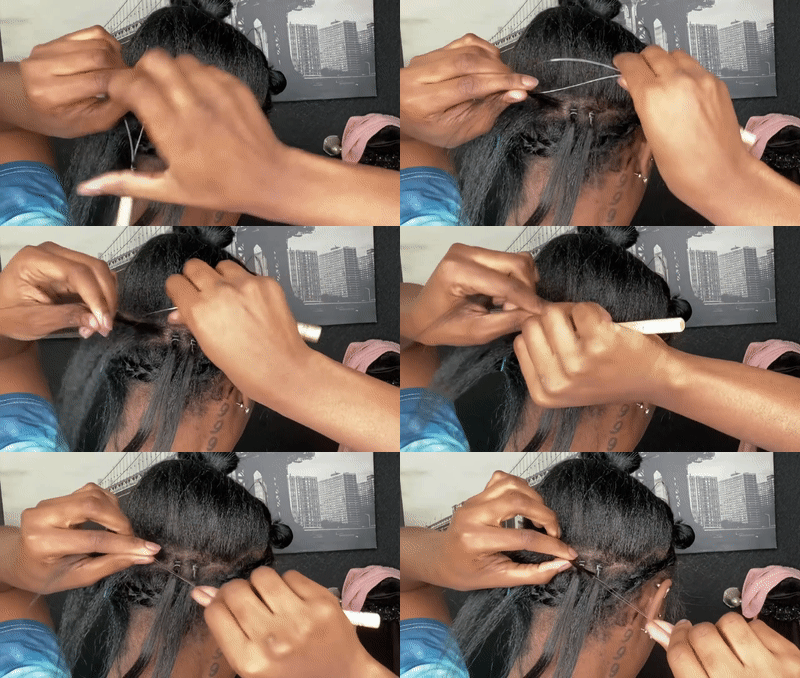
- Take out a piece of I tip hair extensions and insert it between your natural hair and the microbead.
- Clamp it down with pliers.
- Repeat the steps on each strand that you’ve sectioned.
The installment takes hours for a full head which will be a tiring experience if done by yourself. You can get it done professionally in salon if it’s the first time for you to get microlinks. Just have someone else do it for you if need be.
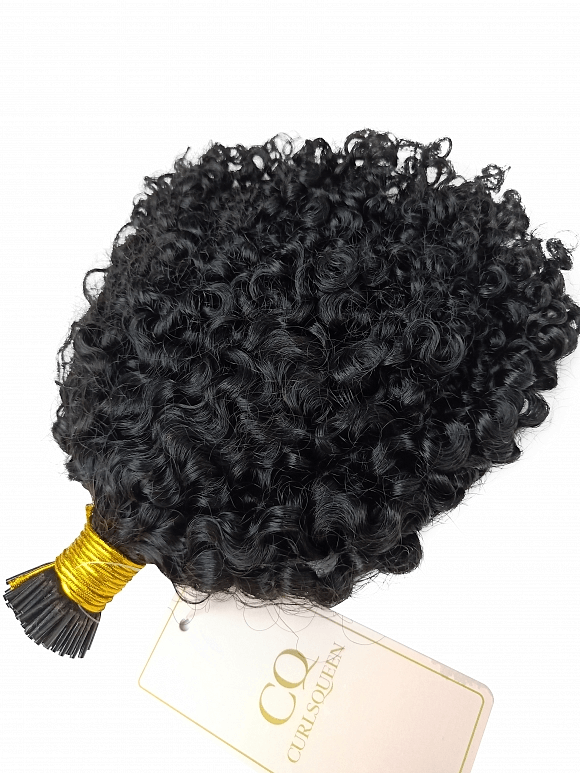
![]()
How to install Micro beaded weft hair extensions?
- Section your natural hair into horizontal parts.
- Tie your hair up or clip them to the top of your head to keep them out of the way except for the bottom layer.
- Hold the weft extensions up and measure the length you need from one end to the other.
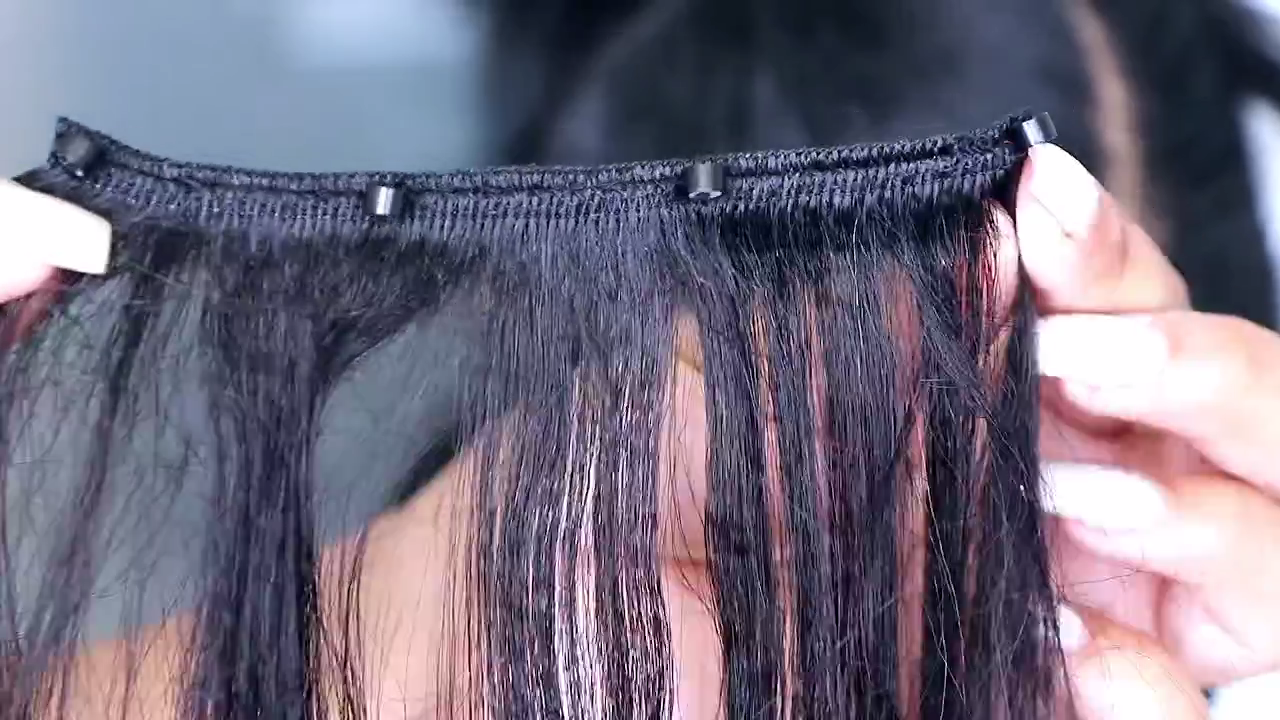
- Cut the extra weft and leave beaded weft the same length with your natural hair.
- Hold the weft extensions and clip each end of the extensions in place.
- Comb out a 1-inch wide strand of your natural hair from one end.
- Thread the pulling hook through the microbead and hook out the strand of hair.
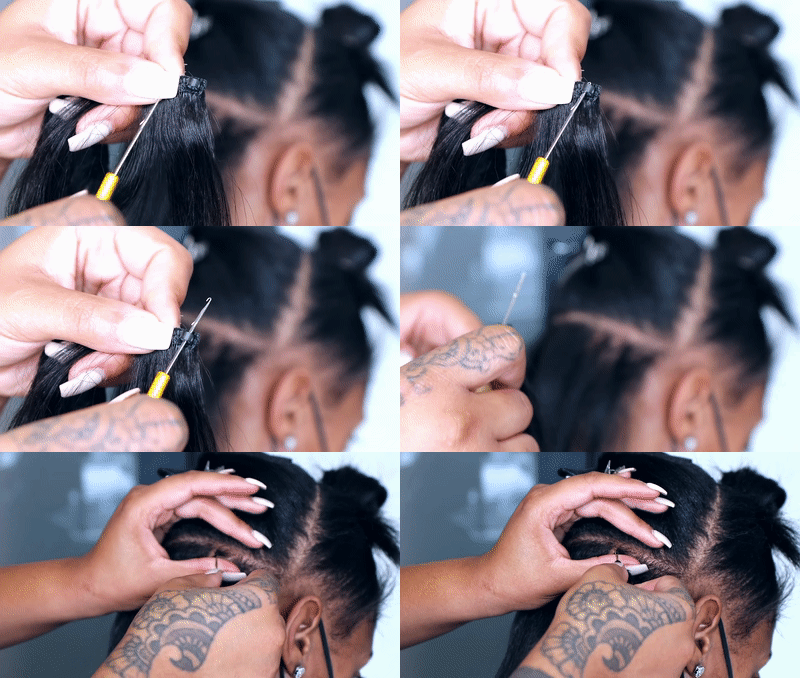
- Clamp the microbead down with the pliers.
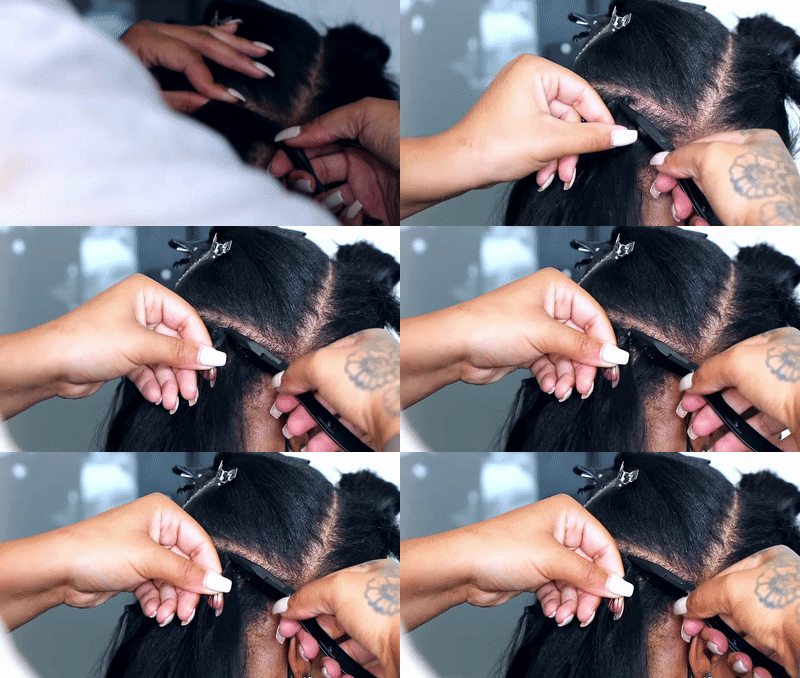
- Repeat the steps.
If you want to make your hair look thicker, just cut out another weft of same length and crochet it in additional row.
How to remove I-tip microlinks?
Removing I-tips without knowing correct steps can actually cause a lot of damage. If you're a newbie and at a loss what to do, turn to the stylist.
- Always start from the bottom row of your head where you’ve installed first and work it from the lowest layer to the highest, and leave side parts at last.
- Section out the bottom row to expose the microbeads and tie the remaining hair out of the way. We are going to removing the beads one by one and row by row.
- Clip the microbeads with pliers and slowly press it in the direction vertical to which they were flattened. Press it lightly at first and increase the pressure little by little until the beads start to loosen.
- Once the beads are extended, the I-tip extension will slide out easily.You may find out fallen hair and product residue in which the extensions have been placed.
- Take it easy. That is quite normal. Just section apart and detangle your hair. Move it away with the tail of your comb or finger and thoroughly cleanse your hair.
- Once the I-tip microlinks are removed completely, comb through your hair.
If you have difficulty in setting apart the extensions and your natural hair, try add some protein spray or hair extensions conditioner to loosen and lubricate the hair.
How to remove beaded weft microlinks?
As we have mentioned, the most efficient way to remove microlinks hair extensions is sectioning them row by row along the layers you installed from. For beaded weft hair extensions, please remove them weft by weft.
-Separate the wefts from the bottom to the top and leave side parts last. Clip the hair out of the way except for the lowest row.
-Cut the threads attaching the weft and the microbeads carefully with scissors between each crisscross slowly move away the thread with the tail of comb. It might be a little bit difficult to undo the knot at the end of the weft. Be careful when you insert the scissors into the knot.
-Move the wefts away from the head.
-Slowly snip the securing stitch.
-Clip the microbeads with pliers and slowly press it in the direction vertical to which they were flattened. Press it lightly and increase the pressure little by little until the beads start to loosen. Do not add too much pressure suddenly.
-Take microbeads away when they slide down. Brush the leftover away with your fingers and comb your hair gently to detangle them.
If you plan to reuse the wefts, wash and cleanse them with shampoo gently to remove grease and product leftovers. Take a deep condition and soak your weft hair extensions for 10-20 minutes before rinsing thoroughly. Store them in box or drawer or somewhere safe and flat. Your wefts will last months with the correct aftercare.
How to maintain microlinks hair extensions?
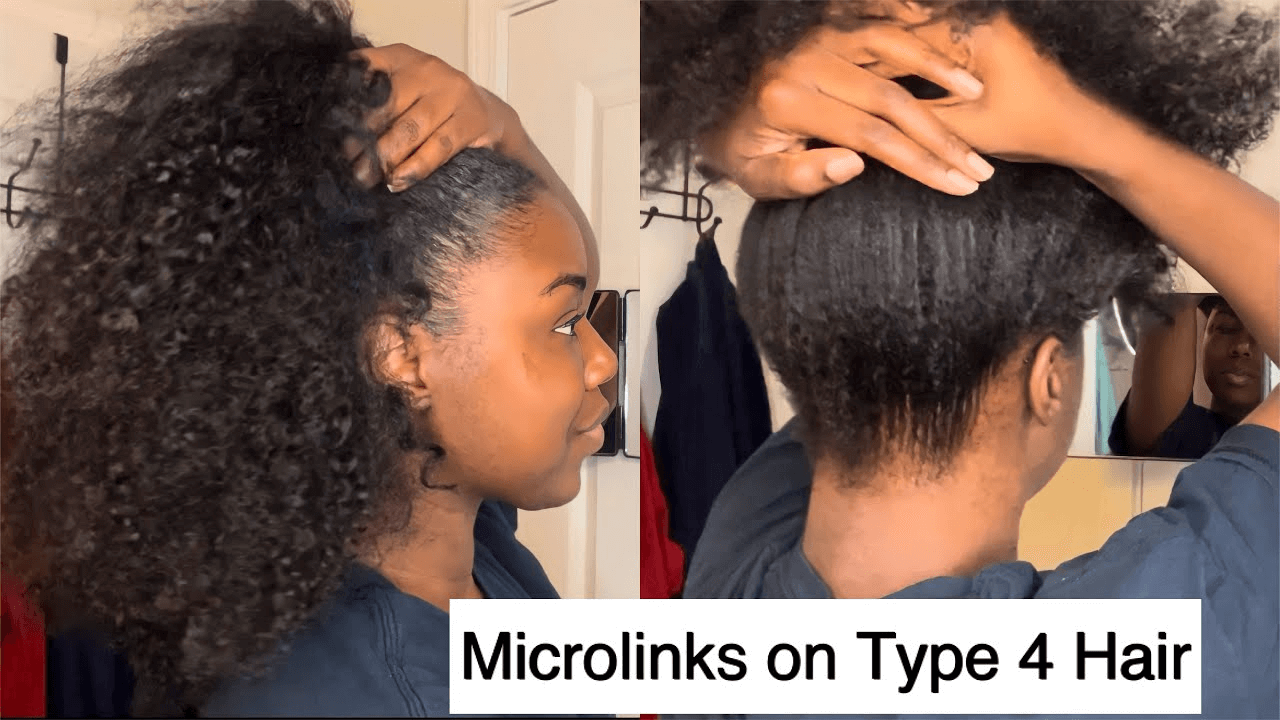
The upkeep of microlinks hair extensions is necessary but not pretty arduous that can be done at home. You can wash your hair gently several days after installment and keep regular wash and detangle routine with the extensions are in.
These basic care methods will protect the beads and hair extensions and keep your natural hair in good condition.
BRUSH
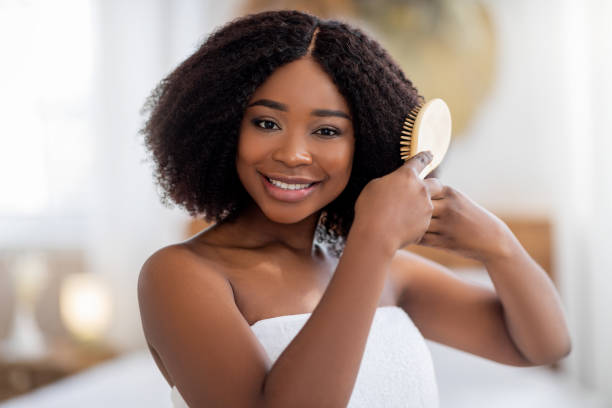
Detangle from the ends with fingers and wide tooth combs and brush them throughout. Avoid the beads at the root.
For any texture of hair extensions the less you brush the worse it become, brush your hair twice every day to minimize tangles.
Spritz your hair with water to maintain their form when you are not willing to brush curly or kinky curls.
Separate the bottom weft and gently brush from the bottom towards rings.
PRODUCTS

When it comes to hair products, it’s always recommended first to choose product that is sulfate-free and avoid parabens and alcohol which can make your extensions dry out without the protection of natural oil. Alcohol can also ruin the microbeads and make them loosen in the long run.
For naturalists with oily or soft hair, clarifying shampoo is recommended to prevent any slipping of the microbeads by cleaning excess oils.
WASH

- Shampoo your hair once a week normally. If you often swim or exercise, please add the times.
- Before washing, use your fingers to make sure microbeads are all separated and won’t tangle with each other.
- Conditioner and dry shampoo should be used on the top section of natural hair and avoid beads because they can cause the hair extensions to become less effective.
- Section your hair and working the shampoo separately.
- Instead of accustomed circular motions to massage the scalp which will pull or catch the beads or weft and tangle the i-tips, try to scrub the scalp horizontally to make the shampoo gently through the scalp and wefts.
- Rinse the scalp thoroughly to eliminate product buildup and work the shampoo onto the hair extension in an up-and-down motion. The same goes for conditioning.
DRY

- Microbeads and hair extensions should be dried fully after washing and they can’t be left overnight. Keep your hair wet for a long period will cause the beads to slide down and the fabric and stitching on the wefts will break down and rot over time.
- Section the hair into separate rows or wefts. Gently rough your hair and blow them with hair drier on a low heat setting from the bottom weft.
- Work from ends to the top of the rows and repeat until the wefts all dry.
HEAT
Apply heat protection thermal sprays or serums from middle to ends when you add heat your hair. Pay attention to keep high temperature away from the root area where the microbeads are to prevent slipping and keep all hot tools away from the area of attachment.
Heat styling tools can be used on microbeads extensions in low heat. High heat will melt the beads which could lead to shedding of your natural hair.
SLEEP

Braid your hair separately, make a loose ponytail or tie them into a bun on the top at night if you don’t want it become tangled overnight.
Keep your hair wrapped with a satin scarf or bonnet to avoid potentially excessive tangling and pulling.
Sleeping with your hair unprotected will cause damage to hair quality, make your hair tangled and lead to headache.
Sleep on a silk pillowcase. Curly and kinky textures should be braided into two or four strands before taking protective covering.
How much will microlinks cost?
The price of microlinks hair extensions ranges from $200 to $700 depend on the length and density you desire while stylists can charge from $750 to $2000 for the service based on location. Some salons will provide hair extensions to you and calculate the price together while others only charge for installment and maintenance service.
How to choose microlinks for myself ?
Many people choose microlinks for natural appearance which allows for half-up, ponytail or other popular hairstyle.
Choose hair extensions that matches your natural hair and they can blend into your natural hair. The microlinks hair extensions of similar texture and color are easy for upkeep and save time for styling.
There are several different hair textures not pretty match your hair texture at Curlsqueen and you can definitely choose one here. You can blow them out, straighten or perm the different pattern a little bit to match and mimics your curl pattern. The high quality human hair extensions can be styled like real hair.
Volume overview
50 pieces: Half Head 50grams - For volume only
100 pieces: Full Head 100grams - For a more natural result
150 pieces: Full Head and a Half 150grams - To extend medium or thick hair
Check out more about:How To Take Care of Microlink Hair Extensions
We hope you enjoy the reading and if you have any questions,contact our CSR via [email protected] or connect with us through live chat on our home page. We're here to help!.


